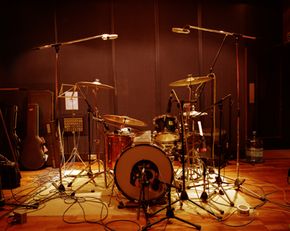
Get the most out of your home studio recordings by using the right microphones and the best miking techniques.
1. Use the right mic for the job
There are three basic kinds of microphones: dynamic, condenser and ribbon mics.
Advertisement
Dynamic microphones are the most versatile and durable. With a dynamic mic, sound waves in the air move a small cone inside of a tight coil of wire surrounded by a magnetic field. It takes a relatively powerful sound wave to move the coil, making dynamic mics less sensitive than condenser or ribbon microphones, but harder to break.
Dynamic mics are good for miking drums, where the microphone is most likely to get hit with a stick, or miking very loud audio like the screaming lead singer of a hard rock band.
With a condenser mic, sound waves cause a thin plastic diaphragm to vibrate, and the vibrations are measured by their distance from an electrified back plate. The diaphragm of a condenser mic is much more sensitive than the coil of the dynamic mic, making them ideal for vocals or for capturing a larger frequency range, like the low bass thump of a kick drum. Condenser mics provide clean, clear, accurate sound reproduction, but also some of the durability of dynamic mics, making them highly versatile for professional recording.
Ribbon microphones are an older technology with superb clarity and sensitivity. Inside these microphones is a thin metal ribbon that hangs down between two magnets. Small vibrations in the ribbon cause fluctuations in the electromagnetic field, creating audio signals. Ribbon microphones are best for capturing the natural or ambient sound from an event or recording session, since the extremely sensitive ribbon picks up vibrations from all sources. They're not ideal for vocalists since they pick up every imperfection. These mics are fragile and will break easily under rough handling or power surges.
2. Stereo miking techniques
Stereo miking is the use of two or more stationary microphones to capture the rich, warm, stereo spectrum of a live performance or studio recording. In stereo miking, each microphone primarily records one end of the stereo spectrum (pan right or pan left). Each mic also captures the phantom recordings of everything in between the two extremes of the spectrum. When the pan left and pan right recordings are laid on top of each other, the two phantom recordings accurately recreate the location of all sounds in the middle.
There are several different stereo miking techniques:
- Coincident pair uses two directional mics angled at 90 degrees with their grills (the tops of the mic) touching. The mic on the right is aiming toward the left side of the stage, and therefore records the sound on the left of the spectrum and vice versa.
- Spaced pair uses two directional mics spaced a few feet apart and aiming straight ahead. The mic on the right side records the right side of the spectrum and the left mic records the left. Sometimes a third mic is used in the center to avoid an overly exaggerated stereo effect.
- Near-coincident pair uses two directional mics with their grilles angled away from each other at 90 to 110 degrees. The grilles should also be seven to 12 inches apart.
- Baffled omni pair uses two omni-directional mics (mics that capture audio from all directions) separated by a foam baffle, an object that prevents each mic from picking up the sound at the far opposite frequencies.
[source: Tape.com]
Are there different ways to mike an acoustic guitar versus an electric? And, how do you mike drums? Read on to find out.
Advertisement

