There are really only four steps involved here: recording, mixing, mastering, and burning. Here's the breakdown on each one.
Recording
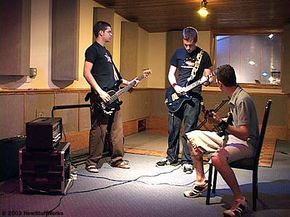
Whether we're talking vocals, guitar, drums, whatever, a recording device saves the individual tracks and lets you play them back. Depending on the recorder, you might be saving the sound on a hard disk, a memory card, a digital tape or a CD.
So you'll need a way to capture the sound and route it to the recorder (the studio workstation, mixer or computer is the recorder, by the way).
When you record vocals, you'll capture the sound using a microphone. The microphone will be connected to an input jack on your computer, mixer or studio workstation. The noise you make gets into the recording equipment through this input jack.
When you want to record electric instruments, the process is pretty much the same. Instead of using a microphone, you just plug your electric guitar, electric bass, drum machine or synthesizer right into the recording device.
If you want to use music you've already recorded music on a CD or cassette tape, you can record from the CD or cassette the way you do with instruments. Just connect a tape player or CD player to your recorder and hit Play. All you're doing is taking music from one source and making it available on another. Any program will have complete instructions on recording just about anything -- you've got a lot of leeway here.
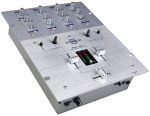
Mixing
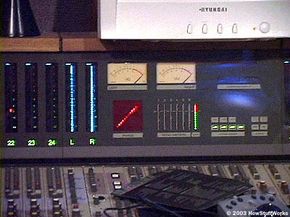
After you've recorded your music, you blend all the elements together. You mix the vocals with the guitar, bass, drum and other instrument tracks.
The mixer gives you control over the volume and sound of each track, and you can set the volume of each track in relation to the other tracks on the recording, so for instance, you can make the vocal track louder than the guitar track in the final mix. Without mixing, the guitar track may be too loud to hear the vocal track.
The main goal of mixing your music is to balance your track levels. Whatever mixer or computer mixing program you use will give you guidelines for adjusting the sound levels of the music.
During mixing, you need to pan the tracks on your CD. When you listen to music, the sound comes from two separate speakers -- during the panning process, you adjust each sound to make sure it comes from the ideal place. For example, lead vocals and guitar often are panned to the center, and background harmonies come out of the sides (left and right). The controls on your mixer let you experiment to find the best configuration.
You can also adjust the equalization of your music. Equalization or EQ is the tone of the music. EQ is very similar to the bass and treble knobs on your home or car stereo. On your recorded tracks, you can select an element of sound and change the tone. For instance, you can make high vocals sound deeper or make the bass line pound a little harder.
Depending on your mixer, you may also be able to add effects to your music (if your mixer doesn't come with this capability, you can just buy an extra program or an external effects machine). There are a lot of different effects you can use to alter the sound of your music, and the right effects can turn a home-grown CD into a professional-sounding album.
Mastering
Once you're done mixing, you need to prepare the mix for the transfer to a CD. Mastering your music essentially means going over the recording one more time to make sure everything sounds the way you want it to before you put it on a CD.
Mastering has three main ideas:
- Identify and fix any problems in your music.The best way to do this is to listen very carefully to your final mix. Check the overall levels. Work with the track volumes.
- Check the overall EQ.You can make volume corrections by equalizing as well as setting your levels. Make sure the tone of the music is what you're going for. Be sure to experiment until you find the perfect spot.
- Add track markers to your CD.Up to now, "track" referred to a part of your music, such as a vocal track or a guitar track; it now refers to an individual song. If your CD has more than one track, you need to put a marker at the beginning of each one. This is so the CD player knows where each song starts. Again, your equipment will have directions that walk you through the how-to.
Burning
At last, it's time to burn your masterpiece. The CD burner may be an independent device, part of a computer or built into a studio workstation.
There are two types of CDs you can use to burn your music. Most CD burners use CD-R/RW. CD-R discs can't be erased once you burn them (the music CDs you buy in stores are CD-R). CD-RW discs can be erased so that you can reburn them.
Burning a CD is cake. The only major decision you have is whether you want to burn the entire CD in one shot or burn one song at a time. Adding one song at a time lets you burn different versions of the same song onto one CD, and you can build the album one song at a time, burning tracks as you complete them.
For more information on cutting your own CD, check out the links on the next page.