How Sound Editing Works

By: Dave Roos
movie
Movie Making Image Gallery Sound editors help build suspense and add excitement to the movies for the audience. See more movie making pictures.
Altrendo Images/Getty Images

At the movies, the image gets all the glamour. When critics talk about an Oscar-worthy film, they usually refer to the powerful acting, sweeping cinematography and dazzling visual effects. But what would happen if you walked into the projection booth and pressed the mute button?

For the average moviegoer, sound may get second billing (or third, or fifth), but it’s an extremely important part of the filmmaking process. Sound establishes mood, builds suspense and adds realism. In animated films, sound is often the difference between a cute cartoon and a convincing digital reality. And what about dialogue? Press the mute button and suddenly those high-paid actors are nothing more than mimes with less makeup.

Advertisement

The sound editor is responsible for everything you hear during a movie. The job is sometimes called sound design because the editor is essentially creating an “aural landscape” from scratch. It’s similar to how a composer writes a symphony. The sound editor must select and balance audio from hundreds of different sources to create a desired effect, anywhere from strict realism to an otherworldly fantasy.

Sound editing is an extremely important job. Experts say that audiences will put up with less than pristine video quality -- jumpy camera work, pixilated images -- but clean, clear audio is a must. You won’t see sound editors on the cover of "Entertainment Weekly," but their role in filmmaking is crucial. Sound editors work directly with the director to ensure that the filmmaker’s vision is reflected in the movie's sound.

What exactly are the different aspects of sound editing? What tools and techniques do editors use to create everything from subtle background details to wild car crashes? Read on to find out.

Advertisement

The Role of the Sound Editor

tom hanks
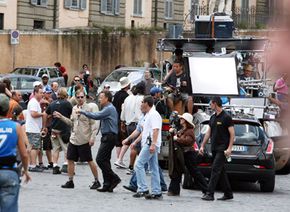
Background noises might interfere with the actors' lines. Here, Tom Hanks works on the set of "Angels and Demons."
Elisabetta Villa/Getty Images

The sound editor’s job begins once the movie has been filmed and all the dialogue has been recorded. This is called the audio post production stage of filmmaking. During postproduction, the director works with various editors to choose the best shots to include in the final cut of the film. This is also when all special effects are added. The sound editor’s responsibilities are to prepare all dialogue, background sounds, sound effects and music for the final mix.

The first step is editing and cleaning up the dialogue. When shooting on film, sound is usually recorded separately using a digital audio recorder. Once the director decides to include a certain take or shot in the movie, the sound editor needs to locate the right audio for that take. After making sure that it matches or syncs with the picture, the sound editor carefully removes any extraneous background noises from the dialogue, like a jet flying overhead or a dog barking.

Advertisement

Sometimes the background noise is so bad that a piece of recorded dialogue is unusable. Or sometimes the director decides to replace a line of dialogue because he thought of a better one later. Now the sound editor needs to do something called automated dialogue replacement, where the actor or actors are brought into a special studio where they sync the new dialogue with the original picture [source: Filmsound.org].

Once the dialogue is finalized, it’s time for sound effects. On bigger productions, a sound-effects designer handles this. There are three different types of sound effects in film: background effects, hard effects and Foley effects [source: Filmsound.org]. We’ll talk more about each of these effects in the next section.

The last part of the sound editor’s job is to work with the music editor or soundtrack composer to choose the right moments for original music or preexisting songs. The sound editor prepares clean versions of all of these audio tracks so they can be added into the final mix.

So what are some of the tricks and techniques that sound editors use to create unique sound effects? Read on to find out.

Advertisement

Using Sound Effects

dog
A dog's barking can be added in post production.
© Isak Tiner/Photonica/Getty Images

Picture a scene in a movie where a man and a woman are sitting and talking on a bench in New York’s Central Park. As they talk, someone on in-line skates cruises by. You can hear birds chirping in the background and the tree leaves rustling slightly in the fall breeze. In the distance, you can hear the muffled sounds of city life: cars honking, buses rumbling and dogs barking.

Believe it or not, almost none of these sounds were recorded on location. The only sound that was recorded live in Central Park was the actor’s dialogue, captured with small microphones attached to their clothes. All of the other sounds -- the birds, dogs, leaves, car horns, and the zip of the in-line skates -- are really sound effects, added later by the sound editor to create a convincing Central Park soundscape.

Advertisement

Background sound effects are the subtlest. The sound editor uses them to create a mood or ambience. If the scene takes place in an office, the background effects could include phones ringing, people talking quietly in the background and the barely perceptible hum of the air conditioning system.

So where do these background sound effects come from? Some sound editors create their own library of recorded sound effects. They might take a microphone to a crowded beach to capture the sound of kids playing and waves crashing. They could record dozens of different rain storms on different surfaces: tin roofs, pavement, dirt roads, et cetera. When it’s time to add background sound effects to that park scene, they dig through their library for “Central Park: Fall.”

Nowadays, it’s more common for a sound editor to purchase large digital libraries of background effects on CD. These offer a wide variety of audio clips that can be layered into a scene to create a convincing ambience.

Besides background effects, some scenes call for various hard effects -- loud, violent noises like gunshots, punches and door slams. Some of these hard effects can be downloaded from effects CDs, while other are created by people called Foley artists.

Foley artists use unconventional techniques to recreate realistic sounds that sync with the onscreen action. While Foley artists might create some hard effects, they’re best known for supplying the subtle audio details of a scene, like footsteps across a wood floor, the sound of a wine glass being placed on a marble countertop, or the whir of those in-line skates.

Foley artists work on a Foley stage that’s stocked with all the strange props they need to do their jobs. Here are some examples of Foley techniques:

  • Crumpling a bag of potato chips to recreate the crackle of a fire
  • For realistic body kicks and punches, beating a cooked chicken stuffed with raw carrots and celery
  • Rustling a ball of unwound cassette tape to mimic footsteps through the grass
  • Using leather gloves for the flapping of bird wings
  • Loading a slingshot with pennies and washers to capture the sound of bullets whizzing by

Now let’s take a trip back to the pre-digital days when sound editing was all done by hand using magnetic tape.

Advertisement

Mechanical Sound Editing

reel to reel
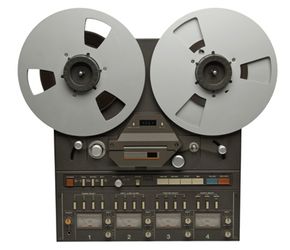
Before computer editing, sound editors used reel-to-reel audio tape players to record sound.
Siede Preis/Getty Images

Before computers came into wide use for sound editing in the 1990s, everything was done with magnetic tape. To make edits using magnetic tape, you literally had to cut the tape, remove the piece of audio that you didn’t want and splice the tape back together again.

The machine of choice for mechanical audio editing was the reel-to-reel tape recorder. With this piece of equipment, you could record and playback audio from circular reels of magnetic audiotape. You also needed several pieces of specialized editing equipment: a razor blade, an editing block and editing tape.

Advertisement

Here’s the basic cut-and-splice editing process using magnetic tape:

  1. Find the initial edit point (or in point), which is the starting point on the tape for the section of audio you want to remove. This is done through a process called scrubbing, where the sound editor slowly rocks the reels back and forth to find the precise point to make the cut.
  2. Using a grease pencil, make a mark on the tape directly over the tape recorder’s playhead.
  3. Play the tape until you reach the first sound you want to keep, called the out point. Also mark that edit point with a grease pencil.
  4. Remove the tape from the reel-to-reel and place it in an editing block. The editing block contains special grooves at 45º and 90º angles.
  5. Line the first edit point up with the 45º groove, cut the tape along the groove with a razor blade. Do the same with the second edit point.
  6. Using special editing tape, tape the two loose ends of magnetic tape back together, leaving no space in between.
  7. Put the tape back on the reel-to-reel and test the edit. You may need to cut more off one of the ends, or maybe you already cut too much!

When magnetic tape was invented in the late 1940s, one of its greatest advantages was that it could hold multiple audio channels without creating a lot of excess noise. This allowed for a process called overdubbing or multi-track recording.

For the first time, the sound editor could isolate and individually edit each piece of audio (dialogue, sound effects, music) and record them as their own track. That’s called predubbing. Then the individual tracks could be recorded on top of each other -- overdubbed -- on a single piece of magnetic tape. The first prototypes of magnetic tape could only handle two audio tracks at a time, but later versions could hold hundreds.

In the next section, we’ll see how the same basic sound editing techniques entered the digital age.

Advertisement

Sound Editing With Computers

computer workstation
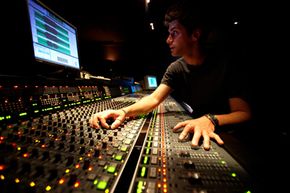
Today, most sound editors use digital audio workstations for sound editing.
Marcus Lyon/Photographer's Choice/Getty Images

Now almost all sound editors use computerized editing systems called digital audio workstations (DAW). Digital audio workstations are multi-track systems that greatly simplify and enhance the sound editing process for all types of professional audio production (film audio, studio recording, DJs, et cetera).

Digital audio workstations vary greatly in size, price and complexity. The most basic systems are simply software applications that can be loaded onto a standard personal computer. More professional systems, like DigiDesign’s Pro Tools, require a special sound card and are typically used in conjunction with large digital mixing boards and are compatible with hundreds of effects and virtual instrument plug-ins. The advantage of all of these systems is that an editor can work with all kinds of audio files -- voices, Foley clips, analog and MIDI music -- from the same interface.

Advertisement

The basic sound editing process hasn’t changed much in the transition from magnetic tape to hard drive. Each element of the film’s audio is still edited as individual tracks (dialogue, effects, music). But with digital file formats and increased computer processing speed, the total amount of tracks is limitless. Besides multiple dialogue tracks, an editor can add dozens of background effects and layers and layers of Foley and music. Multiple tracks can be cut, copied, pasted, trimmed and faded at once. And each track comes with dozens of controls for volume, stereo panning and effects, which greatly simplifies the mixing process.

One of the big advantages of digital audio workstations is that they allow sound editors to work with graphical representations of sound. With magnetic tape, everything was done by ear. Now editors can look at the sound waves on the screen. They can see extraneous background noise and remove it with a click of the mouse. Some DAWs can automatically clean up audio, removing clicks, hisses and low-level background noise that would have ruined a take in the old days.

With graphical interfaces, sound effects designers can study the waveform of a sound and easily bend and distort it to create something completely new. A lion’s roar can be stretched and pitched down to become the bellow of a tremendous sea monster. Newer DAWs even let you control surround sound through a graphical interface. Drag the control to the back left of the screen and that’s where the audio will appear in the theater.

Some DAWs are designed especially for film and video professionals and include the ability to sync audio with film or video clips. This is especially useful for scoring a film or for adding detailed Foley effects that need to be timed precisely with the on-screen action. These systems also allow you to export audio in standard surround sound formats like Dolby 5.1.

For even more information on sound recording and related filmmaking topics, check out the links on the next page.

Advertisement

Advertisement

Loading...