Yo-yo popularity, much like the toy itself, goes up and down, sometimes sleeping and sometimes flying. Today the yo-yo is more popular than ever.
Not only are kids discovering the joys of yo-yoing, but adults, too, are rediscovering what they loved about the yo-yo when they were young.
Advertisement
Nowadays, tricks like Around the World and Skin the Cat aren't just for yo-yo wizards -- you can learn them too! But before you get yo-yoing, there are some essential yo-yo pointers to take in.
Below you'll find links to fun and fundamental information about the ever-popular yo-yo:
The yo-yo was first introduced tothe U.S. in the late 1920s.
The history of the yo-yo is somewhat up in the air. No one really knows who first put two disks together with a small axle separating the halves and then tied a string to the axle and wound it up. Some historians say it was developed in ancient Greece, India, or China.
We do know, however, that the toy first became popular in both England and France in the late 18th century.
Advertisement
The first modern yo-yos were introduced in the United States by Donald F. Duncan in the late 1920s. He is credited with popularizing (though probably not inventing) the slip-string yo-yo, which enables a yo-yo to "sleep."
The yo-yo first became popular in the 1930s, when Duncan sent out teams of traveling yo-yo men (not women, mind you) who would spend three, four, and five weeks in cities and towns across America, teaching tricks, selling yo-yos, and running contests.
The yo-yo reached fad levels in the late 1940s, throughout the 1950s, and into the early 1960s. By then almost every kid in America had a yo-yo.
But the Golden Days of Yo-Yo unfortunately ended when Duncan, who had manufactured more yo-yos than it could sell, went bankrupt in 1965, shortly after the yo-yo boom had suddenly ended. The traveling professional yo-yoers soon disappeared, and the toy began to lose some of its appeal.
However, the yo-yo was not to be defeated. It experienced a major revival in the early 1970s, and today, the yo-yo is experiencing its greatest popularity yet.
Why is it so popular? Many "baby boomers" who reached the prime of their youth during the Golden Days of Yo-Yo have now reached adulthood and have children of their own. Together both adults and children are rediscovering its charm.
In the late 1990s, several yo-yo companies once again began sending out teams of traveling yo-yo men and women. The presence of these teams in the field has also helped rekindle the new yo-yo boom, which began in late 1997 and reached fever pitch in 1998 and 1999.
Perhaps more than any other toy, the yo-yo has had its ups and downs. But one thing is certain: The yo-yo keeps coming back!
What's the difference between a non-sleeping yo-yo, slip-string yo-yo, and transaxle yo-yo? Find the best yo-yo for you in the next section.
For more fun yo-yo tricks and kids activities, check out:
When choosing a yo-yo, it is important to stick to one of the more popular names such as Duncan, Playmaxx, What's Next, Tom Kuhn Custom Yo-Yos, or Yomega.
Beware of cheaply made brands. They are much more difficult to play with. Spend a little extra money and get a better yo-yo.
Advertisement
Non-Sleeping Yo-Yo
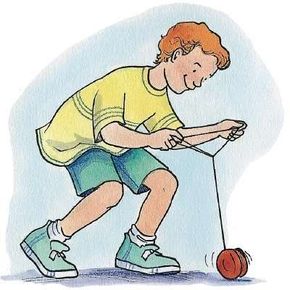
A non-sleeping yo-yo can only be used to perform about a half-dozen tricks. It is perfect for beginners. When winding up a non-sleeping yo-yo, put the string on your finger and throw the yo-yo down toward the floor. The yo-yo will unwind as it descends.
When it reaches the end of the string, kinetic energy will keep the yo-yo spinning. Give the string a tug and the yo-yo will wind back up and return to your hand. (This is similar to the Gravity Pull trick.)
Slip-String Yo-Yos
The slip-string yo-yo makes performing a Sleeper possible, which in turn opens up a universe of hundreds of tricks. With a slip-string yo-yo, the string is actually twice as long as it appears to be.
It starts at the finger loop, goes all the way down to the yo-yo, wraps around the axle, and continues on back to the finger. The yo-yo sits in a small string loop around the axle. It is this loop that permits the yo-yo to "sleep" until it either stops spinning or is recalled to the hand with a firm jerk.
Ball-Bearing and Transaxle Yo-Yos
Transaxle yo-yos are designed to spin for an incredibly long time. With a regular yo-yo, the string loops around the axle. With a transaxle yo-yo, a special, extremely low-resistance plastic ring touches the axle.
The string wraps around the outside of the ring, but never touches the axle. This allows for extremely long spins and it also gives the string an extremely long life.
In the late 1980s, Tom Kuhn introduced an improved transaxle, the SB-2, which used a ball-bearing ring around the axle. Spins of 30 to 60 seconds or more are common with ball-bearing yo-yos.
By comparison, a standard wooden-axle yo-yo can be made to sleep only about 10-15 seconds.
Another invention is the Yo-Yo with a Brain, first introduced by Yomega in 1984. The "Brain" Yomega is a plastic yo-yo with a clutch, invented by Mike Caffrey, who would eventually go to work as head of marketing and sales for Duncan.
When the Yomega yo-yo is spinning at full speed, the clutch separates and allows the yo-yo to spin. As the yo-yo slows down, an arrangement of springs inside the yo-yo pushes the clutch halves back together and causes the yo-yo to return to your hand.
The clutch makes it easier for new yo-yoers to learn how to make a yo-yo "sleep."
Even a new yo-yo will require a few adjustments. Learn how to make a slip-knot, adjust tension, and restring in the next section.
For more fun yo-yo tricks and kids activities, check out:
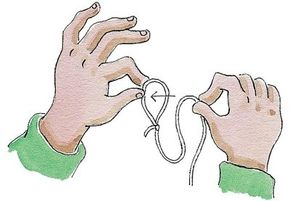
To make a slip knot, slide the yo-yo stringthrough the loop.
Before you begin doing yo-yo tricks, you must first learn the basic fundamentals of yo-yoing. Keep in mind that most of the modern yo-yos can be taken apart by the user. This feature will come in handy in case your string tangles inside your yo-yo.
To untangle your string, simply unscrew the yo-yo, take the halves apart, detangle the string, put the yo-yo back together, and away you yo.
Advertisement
Making a Yo-Yo Slip Knot
When you take your yo-yo out of the package, you'll notice that the yo-yo comes with a loop tied in one end.
Resist your instinct and do not immediately slip that loop over your finger! Instead, slip the string through that loop and make a slip knot. This is what you will place around your middle finger.
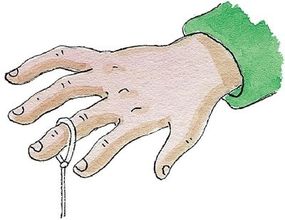
Slip the yo-yo loop over your middle finger.
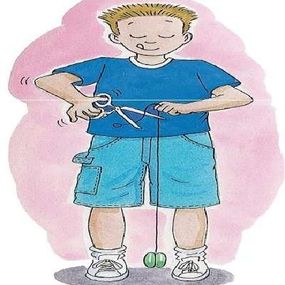
Cutting the String to the Proper Length
If you are more than 5'8", you may be able to use the string at the length it comes out of the package. However, if you are shorter than about 5'8", you'll need to shorten the string. Here's how:
Drop the yo-yo to the floor. Put your forefinger on your belly button. Wrap the top of the string around your forefinger and tie a knot in the string, making a new loop. Carefully cut off the excess string and throw it away.
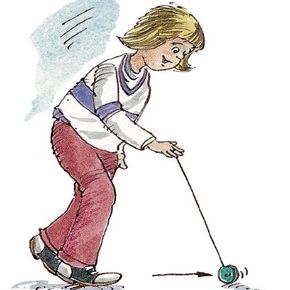
Drop the yo-yo to the floor and cut thestring to belly-button length.
There is no "correct" string length. Some players prefer a slightly shorter string; others prefer it slightly longer. Experiment to find your ideal length. The belly button length offers a good guideline to get you started.
String Tension, or Tightness
A new yo-yo string will need to be tightened to function properly. Begin by slipping the loop you made over your middle finger. Let the yo-yo drop and rest at the end of the string. If the string is too tight, the yo-yo will spin counterclockwise. If the string is too loose, it will spin clockwise.
The yo-yo string will spin counterclockwiseif it's too tight and clockwise if it's too loose.
A quick way to tighten the string back to the proper state of twist is to take the string off your finger, hold the yo-yo in your hand and let the string dangle down freely. The twist in the string will quickly disappear.
Putting the String on Your Yo-Yo
After constant use, your yo-yo string will become frayed and worn. Try to change the string before it breaks. A string that gives way without warning can launch a dangerous missile and send it flying across the room, generally in a direct line with the head of the person least likely to appreciate your new yo-yo skills.
To remove an old string, first let the yo-yo hang freely. Then grab the string about three inches above the yo-yo. With your other hand, spin the yo-yo in a counterclockwise direction until the two halves of the string start to separate. Then stick your fingers in between the two halves of the string, spread the string apart, and pull the yo-yo free of the string.
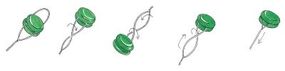
This illustration shows how to attach a new yo-yo string.
To put on a new string, separate the two strands of the string at the unknotted end to create a loop. Slide the yo-yo into this loop in the string. Then twist the string by crossing the strands, allowing the string to twist around the axle of the yo-yo.
Make sure there are no kinks in the string. Most strings are generally too loose and need to be tightened before use. Let the yo-yo hang freely, then spin it clockwise to tighten the string.
Do you know your yo-yo "Circle of Danger?" Learn important tips for having fun and playing safe in the next section.
For more fun yo-yo tricks and kids activities, check out:
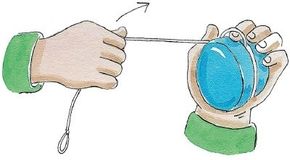
For the first wind, the yo-yo stringgoes over your forefinger.
Here are some important yo-yo tricks and tips to always keep in mind while you play:
Winding up the Yo-Yo
To wind up a sleeping yo-yo, grab one of the yo-yo disks with the fingers of your free hand. Place your thumb or forefinger over the groove that separates the two halves of the yo-yo and wind the string once over your finger. Lift your finger and wind the string inside the finger for the second and third times around.
Advertisement
For the fourth and subsequent winds, pull your finger out of the loop and wind the loop into the yo-yo. Wind the string lightly until the last couple of loops, which should be wound slightly tighter.
Finally, throw your yo-yo down and bring it back up once to clear your string. Now your yo-yo is ready for play.
Challenge Levels
As you become more familiar with your yo-yo, you'll encounter tricks in varying degrees of difficulty: easy, intermediate, or advanced. Oftentimes, yo-yo trick instructions are written for the right-handed yo-yoer. Don't worry, though. If you are a left-handed, simply reverse the directions when necessary.
Yo-Yo Safety
Some yo-yo tricks, such as Around the World, are potentially dangerous tricks to you, to others, and to your surroundings. When playing with your yo-yo, be sure you have a high ceiling so the yo-yo won't hit it. Also make sure that nothing is in the path of your yo-yo.
Observe the "Circle of Danger" concept. Mentally check out the area around you to make sure there is not a person or an object nearby (within about six feet) that can be potentially hit as you perform your tricks.
The most important tip of all is enjoy your yo-yo and play with it safely! Working with a yo-yo can be a dangerous activity and can result in serious injury. Do not practice yo-yo tricks in a crowded area or near windows.
Do not let children under 7 play with yo-yos, and all children should be supervised by adults, as the string could cause choking or other injury.
For more fun yo-yo tricks and kids activities, check out: