How to Draw a Monkey

Monkeys swing through the trees with ease using their strong hands, feet, and tail. Find out how to sketch this jungle acrobat.
In this section, we’ll show you how to draw the above monkey. Either draw it freehand while looking at your computer monitor or print out this page to get a closer look at each step.
Advertisement
Follow the red lines in each illustration to learn exactly what to draw in that step. The lines drawn in previous steps are shown in gray. We’ll show you an illustration of each step and then give you a description of how to draw it.

Step 1: Draw a kidney-bean shape for the body. Add an overlapping oval and circle for the face and the head. Draw two more ovals, one on either side of the head, for ears.
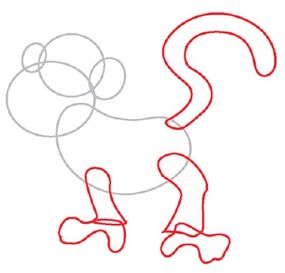
Step 2: Draw a curving, snakelike shape for the tail. Add two long shapes from the bottom of the body for legs. Sketch the feet, and don't forget that monkeys' feet look like hands.
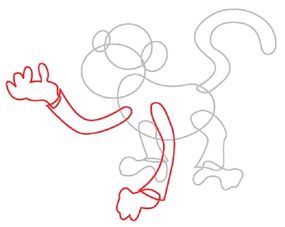
Step 3: Add two more curved shapes for the arms. At the end of the arms, draw the shapes for the hands.
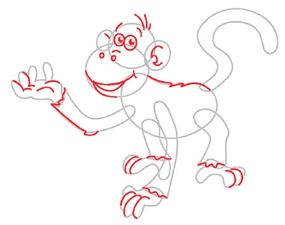
Step 4: Draw ovals for the eyes, pupils, and nostrils. Add a crescent shape for the mouth. Sketch curved lines for eyebrow, nose, and hair details. Put details in the ears, mouth, fingers, and toes.
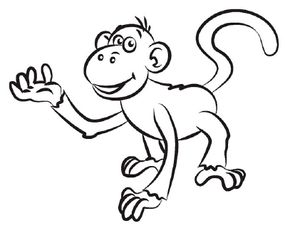
Step 5: Trace the pencil lines you want to keep with a felt-tip pen, and erase any extra lines.
Congratulations! You've learned how to draw a monkey in just a few steps. You can make your drawing even better with practice.
The next animal drawing begins with two simple oval shapes. Read on for detailed directions for drawing a penguin.