How to Draw a Chicken
You can transform basic geometric shapes into this familiar farm-dweller in just a few minutes.
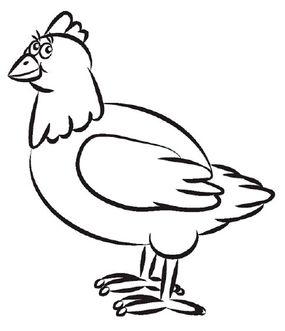
In this section, we’ll show you how to draw the above chicken. Either draw it freehand while looking at your computer monitor or print out this page to get a closer look at each step.
Advertisement
Follow the red lines in each illustration to learn exactly what to draw in that step. The lines drawn in previous steps are shown in gray. We’ll show you an illustration of each step and then give you a description of how to draw it.
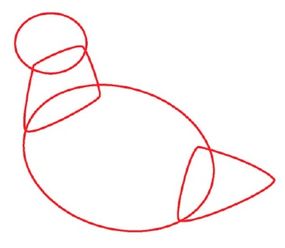
Step 1: Draw one oval for the body and another for the head. Connect the body and head with a rectangular shape for the neck. Add a triangle for the tail.
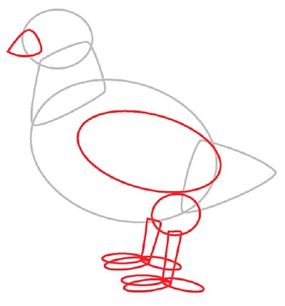
Step 2: Draw an oval shape for the wing and a smaller one for the upper leg. Add a triangle for the beak. Sketch both the leg and toe forms.
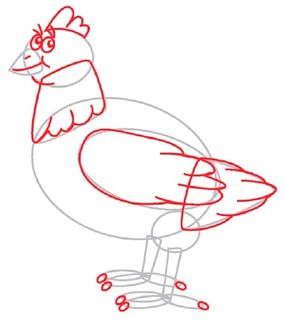
Step 3: Draw ovals for the eyes, and add the pupils and eyelashes. Add some curved shapes for the comb on top of the head. Put in more curved lines for the mouth, nose, chin, and feather details. Draw the claws.
Step 4: Use a felt-tip pen to trace over the lines you want to keep, and erase the extra pencil lines.
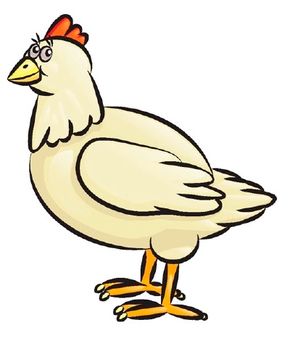
You've finished your chicken drawing, and now you're ready to color it. Use the illustration at the top of this page as a guide for coloring.
The next animal moves slowly, but you'll be able to draw it quickly with our instructions. Discover how to draw a turtle in the next section.